Knee pain is really common among runners (about 40% will experience in a given year).
So...rather than ignoring it and hope its goes away...here are 3 simple tips to help you keep your knees tracking smoothly and efficiently :
1. Increase your cadence

Research suggest a small increase in your cadence (increasing step frequency by 5%) leads to a decrease in ground reaction force.
Essentially, shortening your stride takes the stress off your legs and taps into your 'spring system' that is more efficient and less impact on your knees.
The average runner's cadence is approx 160 steps per minute, and the research shows increasing to 170-180 can make a big difference.
Be warned though, this style of running will put a greater load on your cardio-vascular system - so you may need to keep an eye on your heart rate and take breaks as needed.

Some GPS watches track your cadence.
Otherwise you can download a free metronome to help you. I like to use the metronome for a few minutes at the start of a run to help get my rhythm in place...starting at 170bmp and then up to 180bmp for a few minutes.
2. Strengthen your glutes

"Strong glutes makes everything better" - Perry Nickelston
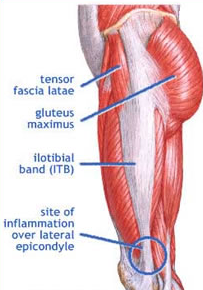
The glutes are the main protectors of the knee. When they become weak or inhibited they allow excess pressure on the knee joint and the muscles that surround it such as the ITB.
When running, the glutes should take most of the load. The gluteus maximus is the biggest and most powerful muscle in the body. But in the presence of pain, injury or excessive sitting it 'switches off' and other muscles are forced to compensate.
Here are some of our favourite exercises to get your glutes back online and functioning:
clam
bridge
single leg bridge
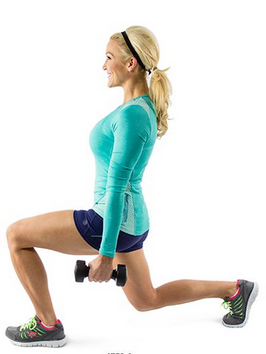
reverse lunge
squats
split squats
If you think your glutes might need some work...then you should join our weekly Pilates class...click here to reserve your place (spots are limited).
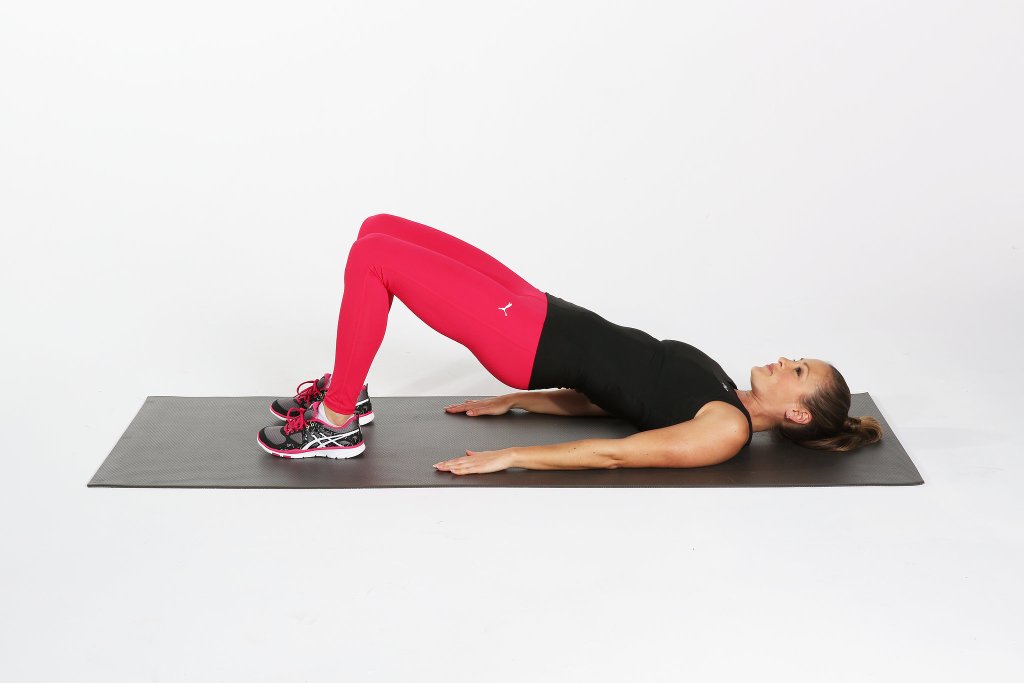
Bridge: Tuck the pelvis under lift your hips - look for a straight line between knees, hip and shoulders. Breathe and relax the shoulders. Hold for 1 minute x 3 sets.
3. Foam roll AFTER you run
The muscles in your legs have to work pretty damn hard during a run - absorbing up to three times your body weight every time you land.
Muscles such as the outer quads, ITB, calf, hamstrings and adductors can get tight and knotted up and have a lot of trouble relaxing back to 'normal' after a hard run.
This tightness can lead to increased pressure on the patella (knee cap) and cause ongoing tracking issues with the knee.
A quick full body tune-up can be completed in less than 90 seconds (see video below) and help iron out tight spots around the knee.
Of course, if you are tight in a particular area, you should spend longer working out the knots.
Is Pain or Injury keeping you from being as active and healthy as you want?